Knitting Project Update #6~ Sweater Construction and Blocking

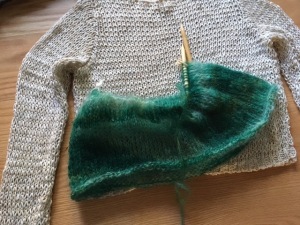
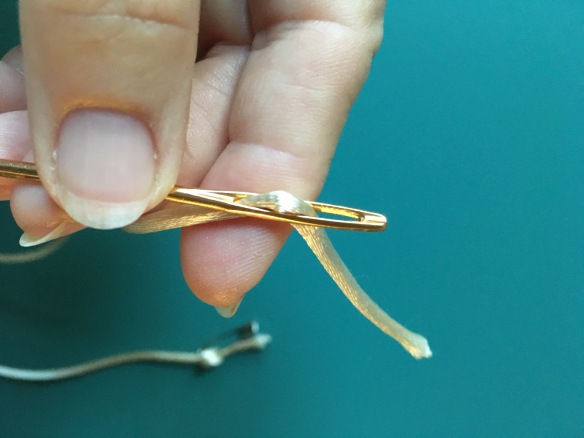
Working with mohair yarn

I prefer the variegated color of mohair yarn for the mystery of how the colors will show in the pattern and so the eye gets distracted from the inconsistency of stitch tension. Working with mohair can be a challenge, so I don’t recommend it for beginners. The challenges come with the light airy fibers tangling with each other and the thinness of the yarn. Thus, missing or adding stitches in numerous ways. One tip to prevent the yarn from slipping off the needle, as I knit a stitch I hold the stitches following the stitch being knitted with my second finger. To keep track of key rows or decreases, I use many small safety pins.

Blocking and finishing construction

Once the sleeves were finished, blocking the sweater came next with a gentle wash, squeezing and rolling in a towel. Then laying the sweater out on a layer of two towels, I stretched the sweater into shape measuring to make sure the sides and sleeves were even to each other and my original desired measurements.

Blocking sweater

Blocking sweater

Once the sweater was dry and after trying on the sweater I decided I wanted less fullness in the bodice. To do this without taking the sweater apart, I created a back inverted pleat. At the center back of the sweater I marked the center with a running stitch of satin cording that I removed after the pleat was completed.

marking completed

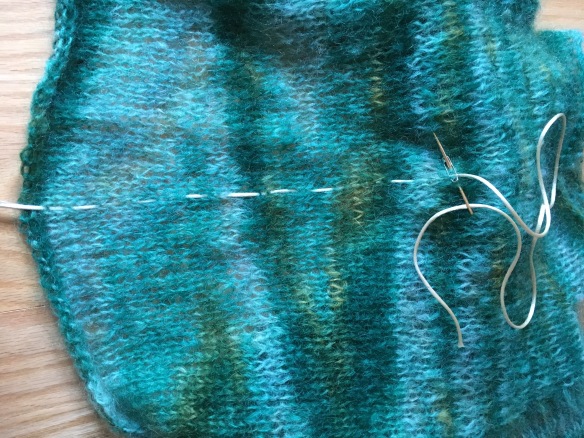
A running stitch of satin cording to mark the center back of sweater.

measuring & pinning pleat

Measuring and pinning the inverted pleat

Adding the button at the top of sewn pleat

Adding the button with mohair yarn at the top of marked pleat

The pleat is held with hidden mohair yarn stitching on the inner and outer pleat folds, 1/4-inch from the folded edges.

stitching inner fold of pleat

stitching the inner pleat fold

stitching outer fold of pleat

stitching the outer pleat fold

The color-coordinating decorative glass antique 1-inch button from my stash tops the pleat. With the yarn ends woven into the sweater my sweater is finished!

Back of Finished sweater!

View of the sweater back. The sweater is finished!

Thank you to my friend Vanessa for cheering me on in numerous ways so the sweater would get done in time for my trip. And thank you to those of you who followed my journey through the making of this sweater.

In the near future I will be showing you what I will be wearing with the sweater and let you get glimpses of my winter trip :)

In the meantime those of you celebrating Thanksgiving, may you focus on the family, friends and things in your life that you can be grateful for and be the example for others to be grateful for the small and big things of life.

Keep on being creative with Needle Arts~


Sweater project~ Adding Sleeves

With my narrow shoulders, I decided to double check the length and use a safety pin marker for my shoulder length. The safety pins on the shoulder seam mark the placement for where to place the sleeves at the end of the shoulders. I chose to knit the sleeves from the armhole down to the cuff. For the sleeve stitching, I started at the armhole underarm by inserting the crochet hook into each stitch  around the armhole. Creating stitches and slipping the stitches onto the knitting needle, while at the same time adjusting for my shoulder length. Since I was already diverting from the original pattern and I desired tighter sleeves, I took detailed notes of my changes for both sleeves to turn out the same. This involved counting/math and a few rip outs to get the desired shape and size I wanted.

using crochet hook to create stitches for sleeves

using crochet hook to create stitches for sleeves

sleeve stitches added, beginning of round at armpit marked with a safety pin

sleeve stitches added, beginning of round at armpit is marked with a safety pin

round 2 of the sleeve beginning, using yarn row marker

round 2 of the sleeve beginning, using yarn row marker

The yarn row marker is made up of a large yarn loop with knots spaced apart the size of the needle. Each loop between the knots is a row. I will add a safety pin at the end for each time I am doubling the number of loops to keep track of the rows.

ready to switch to smaller needles at cuff

ready to switch to smaller needles at cuff

smaller size needle and double point to continue knitting in the round to the end

smaller size needle and double points to continue knitting in the round to the end

Sleeve is completed!

Sleeve is completed!

Ready to knit and complete the second sleeve. Almost done :)

Keep on with your project~


Continuing to Knit in the Round


comparing sides for length

This photo shows I compared the mohair sweater sides with my original sweater pattern inspiration for my desired length. Once I got the desired side length, I continued in the round to keep the pattern of the greens. Imagine a picture of rolling hills with shadows and mist flowing within the lush green rolling hills filled with blue-greens plus a hint of yellow-greens.

To not have dropped shoulders in the sweater, I compared measurements of the new sweater with my bust and shoulders. Figured I needed to cast off/decrease stitches at each side marking. I continued to knit in the round adding a purl stitch at the placement of the side safety pin/yarn markings. This helps locate the armhole placement for later. The purl stitch is very important.

continuation of knitting in the round after armhole decrease

Continuation of knitting in the round after armhole decrease + purl stitch armhole placement

I continued knitting in the round making the purl stitch at the armhole placement up to the beginning of neck and shoulders. I marked the beginning and end of the shoulder stitches with safety pins. Next I sewed around the purl stitching. To be discussed in my next post in detail. For now, you can see the beautiful rolling hills with mist pattern that is taking shape with the colors in this photo.

ready to do the armholes

Have fun knitting your projects with or without sight!

Knitting Project Update: Fitting + Threading Cording

My sweater is coming along. I will share more adaptive techniques in this blog post and future ones as I let you journey through the process of this sweater with me. For me the slow knitter, I have decided to knit the whole sweater body in the round utilizing a few unconventional techniques to speed up the process and to keep the flow of the variegated green color pattern. Did I mention I like variegated colors and textures in yarns because they camouflage the inconsistent tension of my knitting? I am loving the color pattern which I would now describe as mist flowing between lush green rolling hills filled with colors of blue-greens and a hint of yellow-greens. Here is a photo for a glimpse of the colors.

img_1219

Fitting or checking the size of the sweater

To double check the diameter of the sweater, so the sweater size around will be to my liking, I wanted to try on the beginning or the bottom of the sweater. Since the round knitting needle is shorter than my diameter I measured a length of rat-tail cording bigger than my measurements, to transfer the stitches onto for the fitting. I chose rat-tail cording for it’s smooth surface to not get entangled in the mohair fibers. Next I threaded the cording into a yarn bent-tip needle. I used the finger method, although there are yarn needle threaders that might work.

Threading a needle with cording

I can hear the question now- What is the “finger method” or how do you thread cording into a needle non-visually without a needle threader?

Answer: Lay the first 3-inches of cording across the side of your index finger. Place the eye of the needle on top of the cording. Gently, yet firmly rub the needle back and forth once or twice over the cording. Be patient if it does not work on the first time or two, keep trying till you get it. The rubbing should cause the cording to push through the eye like a hill coming up through the eye. Take the hill with your fingers or a pin to pull the loop/hill all the way through the eye. Your needle is now threaded. At the opposite end of the needle tie a safety pin onto the cord end to help keep the cording from pulling all the way through when pulling the cord through the stitches. Here is a photo to show what I just described.

img_1221

Once the needle is threaded, place the yarn needle against the underside of the knitting needle to thread through or catch the stitches. The cording glides more easily through the fibrous stitching by being against the knitting needle. Remove the knitting needle as the stitches are transferred to the cording. Here’s a photo to show my description.

img_1209

After all the stitches are on the cording I tied the cording ends together leaving extra length for the stretch. Then I tried the piece on to figure if I liked the fit. Next I took off the beginnings of the sweater and threaded the knitting needle back through the stitches being held by the cording. Once all the stitches were back on the knitting needle I removed the cording.

Since the diameter of the sweater was fuller than I wanted, I decided I would decrease a few stitches at the sides where I have the yarn markers. Marking these decreases with safety pins, emphasizes the imaginary side seams. This helps me to know where the changes to the pattern shape are. I also made notes for future sweater creations.

How are your winter projects coming along?

Resources

Knitting Guild of America

“Threading a needle” see Appendix in “Needle Arts with Vision Loss” books

“Needle Arts with Vision Loss: How to Enjoy Needle Felting Without Sight
” by Shireen Irvine Perry. Sample or purchase Needle Arts with Vision Loss: How to Enjoy Needle Felting Without Sight: https://www.smashwords.com/books/view/415878

“Needle Arts with Vision Loss: How To Enjoy Making Braided Rugs Without Sight” by Shireen Irvine Perry. 
Sample or purchase Needle Arts with Vision Loss: How To Enjoy Making Braided Rugs Without Sight: https://www.smashwords.com/books/view/415873

“Needle Arts with Vision Loss: How to Enjoy Machine Sewing Without Sight”, 
Sample or purchase Needle Arts with Vision Loss: How to Enjoy Machine Sewing Without Sight: https://www.smashwords.com/books/view/530511

or Print version https://store.bookbaby.com/book/Needle-Arts-With-Vision-Loss-How-to-Enjoy-Machine-Sewing-Without-Sight-POD

Knitting without Sight

Many knitters knit without looking while conversing with others and may not think about that fact. When I point this out to sighted knitters they then realize, yes; they do knit often without looking. Here are ideas to make it easier to knit with vision loss.

Organization: Be organized with a system of labeling the color of yarns and sizes of knitting needles, in a format that works for you. In the Appendix of my Needle Arts books you will find adaptive ideas for labeling supplies non-visually.

Two friends who have knitted without sight all their life use the following systems of labeling in braille. Braille the skein label with the color or place yarns in bags with braille color label on the bag. For leftover yarns, tie a braille label onto the end of the ball of yarn. Needle sizes can be identified with a braille label attached with a rubber band onto the end of the needle or add braille adhesive label to a standard needle gauge. Keep track of colors when knitting with different colors in a project, using yarn loop knots at end of yarn or use different shape bobbins or paperclips. Knit markers, stitch holders or safety pins of various sizes use for placement of pieces and stitch patterns.

 Supplies for beginner knitters: different sizes of larger needles, size 10 minimum to size15; bulky yarns or strips of fabric 1”-2” wide from sheeting or knit T-shirts; large safety pins as markers; a recording device for: Q & A, the learning session to refer back to and other note taking info while learning.

Beginners start with finger knitting. Then graduate to large size needles with bulky yarn or knit fabric strips so it will be easier to feel the stitch, to understand what the stitch is and to more easily be able to problem solve the dropped or mistaken stitches. Once the skill is learned the smaller needles, smaller stitches and less bulky size yarns will be easier to manage, especially with dropped stitches.

Learn stitches in the following order: casting on, knit stitch, casting off, purl stitch, increase & decrease, yarn over, etc. I prefer teaching casting on with the continental double needle knit technique. Because the tension of the first row is more consistent making it easier to tactially feel with less confusion. And the knit stitch is learned in the process, so the actual knitting process starts with more ease.

Project Suggestions: Using fabric strips make a sampler or trivet or coaster or pillow or rug; with worsted yarns or thinner make a scarf, belt, hat, cell phone holder, baby size blanket, slippers, etc.

Pick out a pattern: There are knitting books available in braille for braille readers from the American Printing House, Our Special Magazine, National Braille Press, Blind Mice Marked. Or have a friend/reader record patterns on a recording device. Or scan patterns with a scanner, transfer to a disc or a braille embosser. Graphs need to be dictated.

 Handling dropped stitches: Catch a dropped stitch with a small safety pin and go up the ladder of yarn above using safety pin. Use the pin to loop the stitches over or under to make the desired stitch pattern. For some, this is easier than using a crochet hook. There is also a tool, “Fix-A-Stitch”, that may be easier to use than a crochet hook. Imagine a 3-inch crochet hook with hooks at both ends. Crochet hooks can be stored in plastic snack lock bags and labeled.

Resources: “Fix-A-Stitch”, www.FixAStitch.com includes video and written instructions

Knitting Guild of America

“Needle Arts with Vision Loss: How to Enjoy Needle Felting Without Sight
” by Shireen Irvine Perry. Sample or purchase Needle Arts with Vision Loss: How to Enjoy Needle Felting Without Sight: https://www.smashwords.com/books/view/415878

“Needle Arts with Vision Loss: How To Enjoy Making Braided Rugs Without Sight” by Shireen Irvine Perry. 
Sample or purchase Needle Arts with Vision Loss: How To Enjoy Making Braided Rugs Without Sight: https://www.smashwords.com/books/view/415873

“Needle Arts with Vision Loss: How to Enjoy Machine Sewing Without Sight”, 
Sample or purchase Needle Arts with Vision Loss: How to Enjoy Machine Sewing Without Sight: https://www.smashwords.com/books/view/530511

“Projects for Kids of All Ages, Kids Knitting” by Melanie  Falick


Enjoy Knitting with or without sight!

Q & A: What winter projects are you working on?

Since I am doing some traveling this winter, I decided I needed a warm lightweight sweater to coordinate with my traveling wardrobe of greens, burgundy and navy.

Looking through my yarn stash I found some beautiful hand dyed variegated green mohair yarn that has been waiting for about 15 years for me to make something. This yarn with large US size 13 or 9mm, needles for knitting in the round became my plan for the sweater to progress more quickly. Since I had a sweater I already liked in cotton that became my pattern inspiration for a cropped, funnel neck, long sleeve sweater. I found a Rowan pattern by Marie Wallin, “Marsh” that I adapted for my use.

Here is the start of the project:

varigated green mohair yarn project

Variegated green mohair yarn in a basket showing knitting in the round of two rows. Yarn loop markers for the two sides that will line up with the sleeves armpit.

Knitting varigated green mohair in the round. Sweater body started

About 2-inches of knitting in the round. I am liking how there is a pattern that is more swirl and no stripes.

Next week I will share some adaptive blind techniques I have used with my students over the years.

Till next time keep enjoying your needle arts projects in the making with or without sight.

Discovery: Alabama Chanin

It is always fun to discover a new resource to help with a Needle Arts project. If my students don’t want to cut their own strips of cotton knit jersey used in knitting, crochet or braiding, this material is available out of organic cotton in about 52 color choices from Alabamachanin.com.

I picked up one of Natalie Chanin’s books, “Alabama Studio + Design” this last weekend. What an inspiring resource! So inspiring that I started exploring her company website. This is where I discovered in the menu tab “Shop Studio Style DIY” then in “Fabric + Sewing” tab, the yarn balls or cotton knit ropes among other items to use in Needle Arts projects.

These yarn balls are similar to what I make with my students when I teach them knitting or crochet using larger knitting needles such as size 13 or 15 and crochet hooks size P or Q.

With my students, we usually take old T-shirts. Cut them into 1-inch or wider strips using a template as a guide to cut the strips evenly. The template is held to the fabric with office clips. Then we connect the strips together with stitching or the interlocking technique I describe in my book, “Needle Arts with Vision Loss: How to Enjoy Making Braided Rugs Without Sight”.


Go to the Book Series menu tab on my site to find my book in MP3 format or to link to Smashwords for the e-book format.


Possible projects to make with cotton knit yarn whether knitting, crochet or braiding: headbands, mats or rugs, washcloths, baskets, embellishing or ties in garments.


Be creative and keep on enjoying needle arts without sight!